Check app functionality with an integration test
Learn how to write integration tests
Introduction
#This guide describes how to run integration tests with your Flutter app. With it, you'll learn how to do the following:
- Set up integration tests.
- Verify if an app displays specific text.
- Tap specific widgets.
- Run integration tests.
The guide references the counter_app project that comes with
Flutter and the Flutter integration_test
package. The
integration_test package lets you:
- Use the
flutter drivecommand to run tests on a physical device or emulator. - Run on Firebase Test Lab, to automate testing on a variety of devices.
- Use flutter_test APIs to write tests in a style similar to widget tests.
Create a new app to test
#
Integration testing requires an app to test.
This example uses the built-in Counter App example
that Flutter produces when you run the flutter create command.
The counter app allows a user to tap on a button to increase a counter.
-
To create an instance of the built-in Flutter app, run the following command in your terminal:
flutter create counter_app Change into the
counter_appdirectory.Open
lib/main.dartin your preferred IDE.-
Add a
keyparameter to thefloatingActionButton()widget with an instance of aKeyclass with a string value ofincrement.dartfloatingActionButton: FloatingActionButton( key: const ValueKey('increment'), onPressed: _incrementCounter, tooltip: 'Increment', child: const Icon(Icons.add), ), Save your
lib/main.dartfile.
After these changes,
the lib/main.dart file should resemble the following code.
import 'package:flutter/material.dart';
void main() => runApp(const MyApp());
class MyApp extends StatelessWidget {
const MyApp({super.key});
@override
Widget build(BuildContext context) {
return const MaterialApp(
title: 'Counter App',
home: MyHomePage(title: 'Counter App Home Page'),
);
}
}
class MyHomePage extends StatefulWidget {
const MyHomePage({super.key, required this.title});
final String title;
@override
State<MyHomePage> createState() => _MyHomePageState();
}
class _MyHomePageState extends State<MyHomePage> {
int _counter = 0;
void _incrementCounter() {
setState(() {
_counter++;
});
}
@override
Widget build(BuildContext context) {
return Scaffold(
appBar: AppBar(title: Text(widget.title)),
body: Center(
child: Column(
mainAxisAlignment: MainAxisAlignment.center,
children: <Widget>[
const Text('You have pushed the button this many times:'),
Text(
'$_counter',
style: Theme.of(context).textTheme.headlineMedium,
),
],
),
),
floatingActionButton: FloatingActionButton(
// Provide a Key to this button. This allows finding this
// specific button inside the test suite, and tapping it.
key: const Key('increment'),
onPressed: _incrementCounter,
tooltip: 'Increment',
child: const Icon(Icons.add),
),
);
}
}
Add the integration_test dependency
#
You need to add the testing packages to your new app.
To add integration_test and flutter_test packages as
dev_dependencies using sdk: flutter, run following command.
flutter pub add "dev:integration_test:{sdk: flutter}"
Output:
Building flutter tool...
Resolving dependencies...
Got dependencies.
Resolving dependencies...
+ file 7.0.0
+ flutter_driver 0.0.0 from sdk flutter
+ fuchsia_remote_debug_protocol 0.0.0 from sdk flutter
+ integration_test 0.0.0 from sdk flutter
...
  test_api 0.6.1 (0.7.1 available)
  vm_service 13.0.0 (14.2.1 available)
+ webdriver 3.0.3
Changed 8 dependencies!
7 packages have newer versions incompatible with dependency constraints.
Try `flutter pub outdated` for more information.
Updated pubspec.yaml file:
# ...
dev_dependencies:
  # ... added dependencies
  flutter_test:
    sdk: flutter
  flutter_lints: ^6.0.0
  integration_test:
    sdk: flutter
# ...
Create the integration test files
#Integration tests reside in a separate directory inside your Flutter project.
- Create a new directory named
integration_test. - Add empty file named
app_test.dartin that directory.
The resulting directory tree should resemble the following:
counter_app/
  lib/
    main.dart
  integration_test/
    app_test.dart
Write the integration test
#
The integration test file consists of a Dart code file
with dependencies on integration_test, flutter_test,
and your app's Dart file.
Open your
integration_test/app_test.dartfile in your preferred IDE.-
Copy the following code and paste it into your
integration_test/app_test.dartfile. The last import should point to themain.dartfile of yourcounter_app. (Thisimportpoints to the example app calledintroduction.)integration_test/counter_test.dartdartimport 'package:flutter/material.dart'; import 'package:flutter_test/flutter_test.dart'; import 'package:how_to/main.dart'; import 'package:integration_test/integration_test.dart'; void main() { IntegrationTestWidgetsFlutterBinding.ensureInitialized(); group('end-to-end test', () { testWidgets('tap on the floating action button, verify counter', ( tester, ) async { // Load app widget. await tester.pumpWidget(const MyApp()); // Verify the counter starts at 0. expect(find.text('0'), findsOneWidget); // Finds the floating action button to tap on. final fab = find.byKey(const ValueKey('increment')); // Emulate a tap on the floating action button. await tester.tap(fab); // Trigger a frame. await tester.pumpAndSettle(); // Verify the counter increments by 1. expect(find.text('1'), findsOneWidget); }); }); }
This example goes through three steps:
-
Initialize
IntegrationTestWidgetsFlutterBinding. This singleton service executes tests on a physical device. Interact and test widgets using the
WidgetTesterclass.Test the important scenarios.
Run integration tests
#The integration tests that run vary depending on the platform on which you test.
- To test a desktop platform, use the command line or a CI system.
- To test a mobile platform, use the command line or Firebase Test Lab.
- To test in a web browser, use the command line.
Test on a desktop platform
#Expand if you test Linux apps using a CI system
To test a Linux app, your CI system must invoke an X server first.
In the GitHub Action, GitLab Runner, or similar configuration file,
set the integration test to work with the xvfb-run tool.
Doing this invokes an X Window system into which Flutter can launch and test your Linux app.
As an example using GitHub Actions, your jobs.setup.steps should
include a step resembling the following:
      - name: Run Integration Tests
        uses: username/xvfb-action@v1.1.2
        with:
          run: flutter test integration_test -d linux -r github
This starts the integration test within an X Window.
If you don't configure your integration in this way, Flutter returns an error.
Building Linux application...
Error waiting for a debug connection: The log reader stopped unexpectedly, or never started.
To test on a macOS, Windows, or Linux platform, complete the following tasks.
-
Run the following command from the root of the project.
flutter test integration_test/app_test.dart -
If offered a choice of platform to test, choose the desktop platform. Type
1to choose the desktop platform.
Based on platform, the command result should resemble the following output.
PS C:\path\to\counter_app> flutter test .\integration_test\app_test.dart
Resolving dependencies...
Downloading packages...
  flutter_lints 3.0.2 (4.0.0 available)
  leak_tracker 10.0.4 (10.0.5 available)
  leak_tracker_flutter_testing 3.0.3 (3.0.5 available)
  lints 3.0.0 (4.0.0 available)
  material_color_utilities 0.8.0 (0.11.1 available)
  meta 1.12.0 (1.15.0 available)
  test_api 0.7.0 (0.7.1 available)
  vm_service 14.2.1 (14.2.2 available)
Got dependencies!
8 packages have newer versions incompatible with dependency constraints.
Try `flutter pub outdated` for more information.

Connected devices:

Windows (desktop) • windows • windows-x64    • Microsoft Windows [Version 10.0.22631.3593]
Chrome (web)      • chrome  • web-javascript • Google Chrome 124.0.6367.207
Edge (web)        • edge    • web-javascript • Microsoft Edge 124.0.2478.97

[1]: Windows (windows)
[2]: Chrome (chrome)
[3]: Edge (edge)

Please choose one (or "q" to quit): 1

00:00 +0: loading C:/path/to/counter_app/integration_test/app_test.dart               B
00:29 +0: loading C:/path/to/counter_app/counter_app/integration_test/app_test.dart   29.1s
√ Built build\windows\x64\runner\Debug\counter_app.exe
00:31 +1: All tests passed!
flutter test integration_test
Resolving dependencies...
Downloading packages...
flutter_lints 3.0.2 (4.0.0 available)
> leak_tracker 10.0.4 (was 10.0.0) (10.0.5 available)
> leak_tracker_flutter_testing 3.0.3 (was 2.0.1) (3.0.5 available)
> leak_tracker_testing 3.0.1 (was 2.0.1)
lints 3.0.0 (4.0.0 available)
material_color_utilities 0.8.0 (0.11.1 available)
> meta 1.12.0 (was 1.11.0) (1.15.0 available)
> test_api 0.7.0 (was 0.6.1) (0.7.1 available)
> vm_service 14.2.1 (was 13.0.0) (14.2.2 available)
Changed 6 dependencies!
8 packages have newer versions incompatible with dependency constraints.
Try `flutter pub outdated` for more information.
Connected devices:
macOS (desktop) • macos • darwin-arm64 • macOS 14.4.1 23E224 darwin-arm64
Mac Designed for iPad (desktop) • mac-designed-for-ipad • darwin • macOS 14.4.1 23E224 darwin-arm64
Chrome (web) • chrome • web-javascript • Google Chrome 124.0.6367.208
No wireless devices were found.
[1]: macOS (macos)
[2]: Mac Designed for iPad (mac-designed-for-ipad)
[3]: Chrome (chrome)
Please choose one (or "q" to quit): 1
00:01 +0: loading /path/to/counter_app/integration_test/app_test.dart R
00:02 +0: loading /path/to/counter_app/integration_test/app_test.dart 846ms
00:03 +0: loading /path/to/counter_app/integration_test/app_test.dart B
Building macOS application...
✓ Built build/macos/Build/Products/Debug/counter_app.app
00:32 +1: All tests passed!
flutter test integration_test/app_test.dart
Connected devices:
Linux (desktop) • linux • linux-x64 • Ubuntu 22.04.4 LTS 6.5.0-35-generic
Chrome (web) • chrome • web-javascript • Google Chrome 104.0.5112.101
[1]: Linux (linux)
[2]: Chrome (chrome)
Please choose one (or "q" to quit): 1
00:00 +0: /path/to/counter_app/integration_test/app_test.dart B
00:16 +0: /path/to/counter_app/integration_test/app_test.dart
✓ Built build/linux/x64/debug/bundle/counter_app
Test on an Android device
#To test on a real Android device, complete the following tasks.
Connect the Android device.
-
Run the following command from the root of the project.
flutter test integration_test/app_test.dartThe result should resemble the following output.
flutter test integration_test/app_test.dart 00:04 +0: loading /path/to/counter_app/integration_test/app_test.dart 00:15 +0: loading /path/to/counter_app/integration_test/app_test.dart 00:18 +0: loading /path/to/counter_app/integration_test/app_test.dart 2,387ms Installing build/app/outputs/flutter-apk/app.apk... 612ms 00:21 +1: All tests passed! -
Verify that the test removed the Counter App when it finished. If not, subsequent tests fail. If needed, press on the app and choose Remove App from the context menu.
Test on an iOS device
#To test on a real iOS device, complete the following tasks.
Connect the iOS device.
-
Run the following command from the root of the project.
flutter test integration_test/app_test.dartThe result should resemble the following output.
flutter test integration_test/app_test.dart 00:04 +0: loading /path/to/counter_app/integration_test/app_test.dart 00:15 +0: loading /path/to/counter_app/integration_test/app_test.dart 00:18 +0: loading /path/to/counter_app/integration_test/app_test.dart 2,387ms Xcode build done. 13.5s 00:21 +1: All tests passed! -
Verify that the test removed the Counter App when it finished. If not, subsequent tests fail. If needed, press on the app and choose Remove App from the context menu.
Test in a web browser
#To test in a web browser, perform the following steps.
-
Install ChromeDriver into the directory of your choice.
npx @puppeteer/browsers install chromedriver@stableTo simplify the install, this command uses the
@puppeteer/browsersNode library. Add the path to ChromeDriver to your
$PATHenvironment variable.-
Verify the ChromeDriver install succeeded.
chromedriver --version ChromeDriver 124.0.6367.60 (8771130bd84f76d855ae42fbe02752b03e352f17-refs/branch-heads/6367@{#798}) -
In your
counter_appproject directory, create a new directory namedtest_driver.mkdir test_driver In this directory, create a new file named
integration_test.dart.-
Copy the following code and paste it into your
integration_test.dartfile.test_driver/integration_test.dartdartimport 'package:integration_test/integration_test_driver.dart'; Future<void> main() => integrationDriver(); -
Launch
chromedriveras follows:chromedriver --port=4444 -
From the root of the project, run the following command:
flutter drive \ --driver=test_driver/integration_test.dart \ --target=integration_test/app_test.dart \ -d chromeThe response should resemble the following output:
Resolving dependencies... leak_tracker 10.0.0 (10.0.5 available) leak_tracker_flutter_testing 2.0.1 (3.0.5 available) leak_tracker_testing 2.0.1 (3.0.1 available) material_color_utilities 0.8.0 (0.11.1 available) meta 1.11.0 (1.14.0 available) test_api 0.6.1 (0.7.1 available) vm_service 13.0.0 (14.2.1 available) Got dependencies! 7 packages have newer versions incompatible with dependency constraints. Try `flutter pub outdated` for more information. Launching integration_test/app_test.dart on Chrome in debug mode... Waiting for connection from debug service on Chrome... 10.9s This app is linked to the debug service: ws://127.0.0.1:51523/3lofIjIdmbs=/ws Debug service listening on ws://127.0.0.1:51523/3lofIjIdmbs=/ws 00:00 +0: end-to-end test tap on the floating action button, verify counter 00:01 +1: (tearDownAll) 00:01 +2: All tests passed! All tests passed. Application finished.To run this as a headless test, run
flutter drivewith-d web-serveroption:flutter drive \ --driver=test_driver/integration_test.dart \ --target=integration_test/app_test.dart \ -d web-server
To learn more, see the Running Flutter driver tests with web wiki page.
Test in Firebase Test Lab (Android)
#You can use Firebase Test Lab to test Android targets.
Android setup
#Follow the instructions in the Android Device Testing section of the README.
Test Lab project setup
#Launch your Firebase Console.
Create a new Firebase project if necessary.
-
Navigate to Quality > Test Lab.
Upload an Android APK
#Complete the following steps to upload an Android APK.
-
Create an APK using Gradle.
// Go to the Android directory which contains the gradlew script pushd android // Build a debug APK for Flutter with gradlew // Note that a standard --release build will not include package:integration_test flutter build apk --debug // Build an Android test APK ./gradlew app:assembleAndroidTest // Build a debug APK by passing in an integration test ./gradlew app:assembleDebug -Ptarget=integration_test/<name>_test.dart-
<name>_test.dart: The file created in the Project Setup section.
-
-
If needed, pass parameters into the integration test as a comma-separated list. Encode all parameters as
base64../gradlew project:task -Pdart-defines="{base64 (key=value)}[, ...]"(key=value)}[, ...]: Replace this with a comma-separated list of key value pairs.
-
Return to your previous directory.
popd
For additional instructions, see the Firebase Test Lab section of the README.
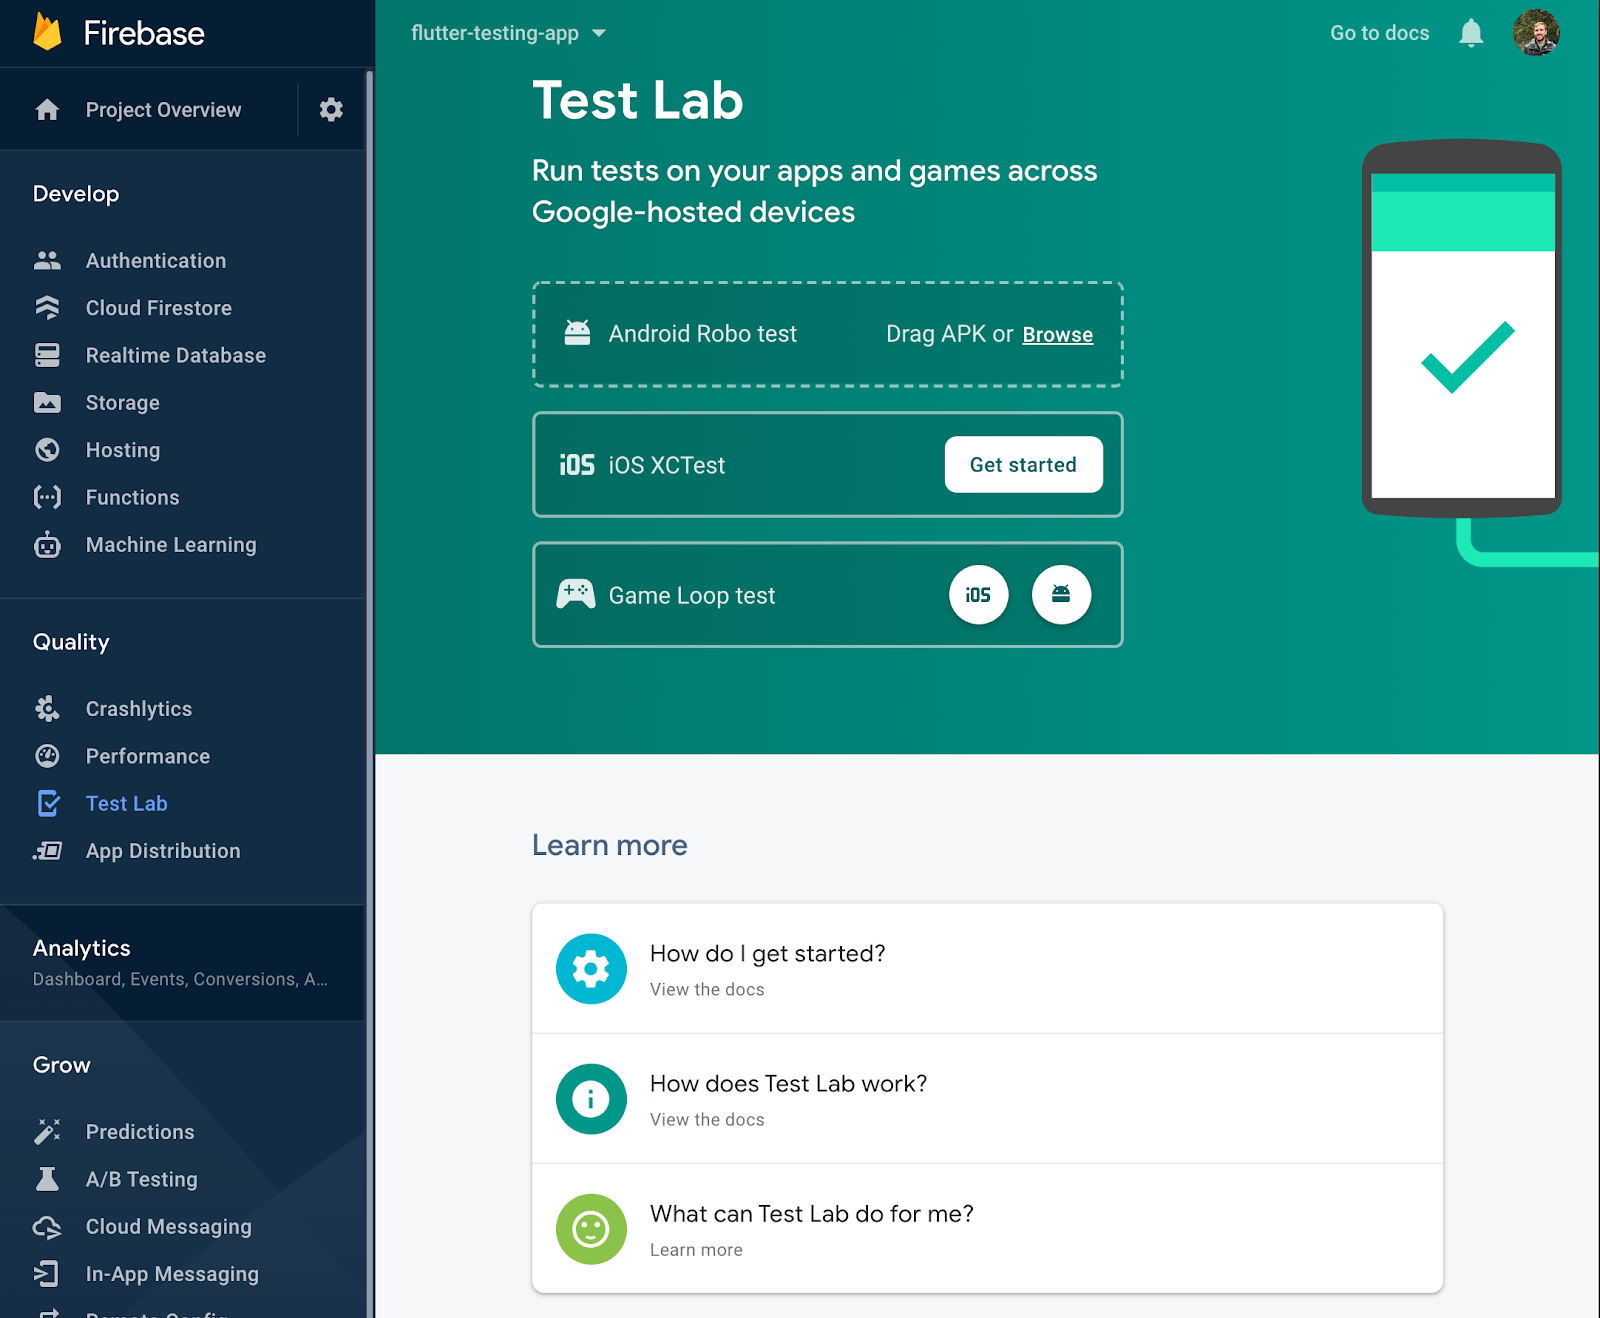
Start Robo test
#To use Robo test to run integration tests, complete the following steps.
-
Drag the debug APK from
<flutter_project_directory>/build/app/outputs/apk/debuginto the Android Robo Test target on the web page. For example: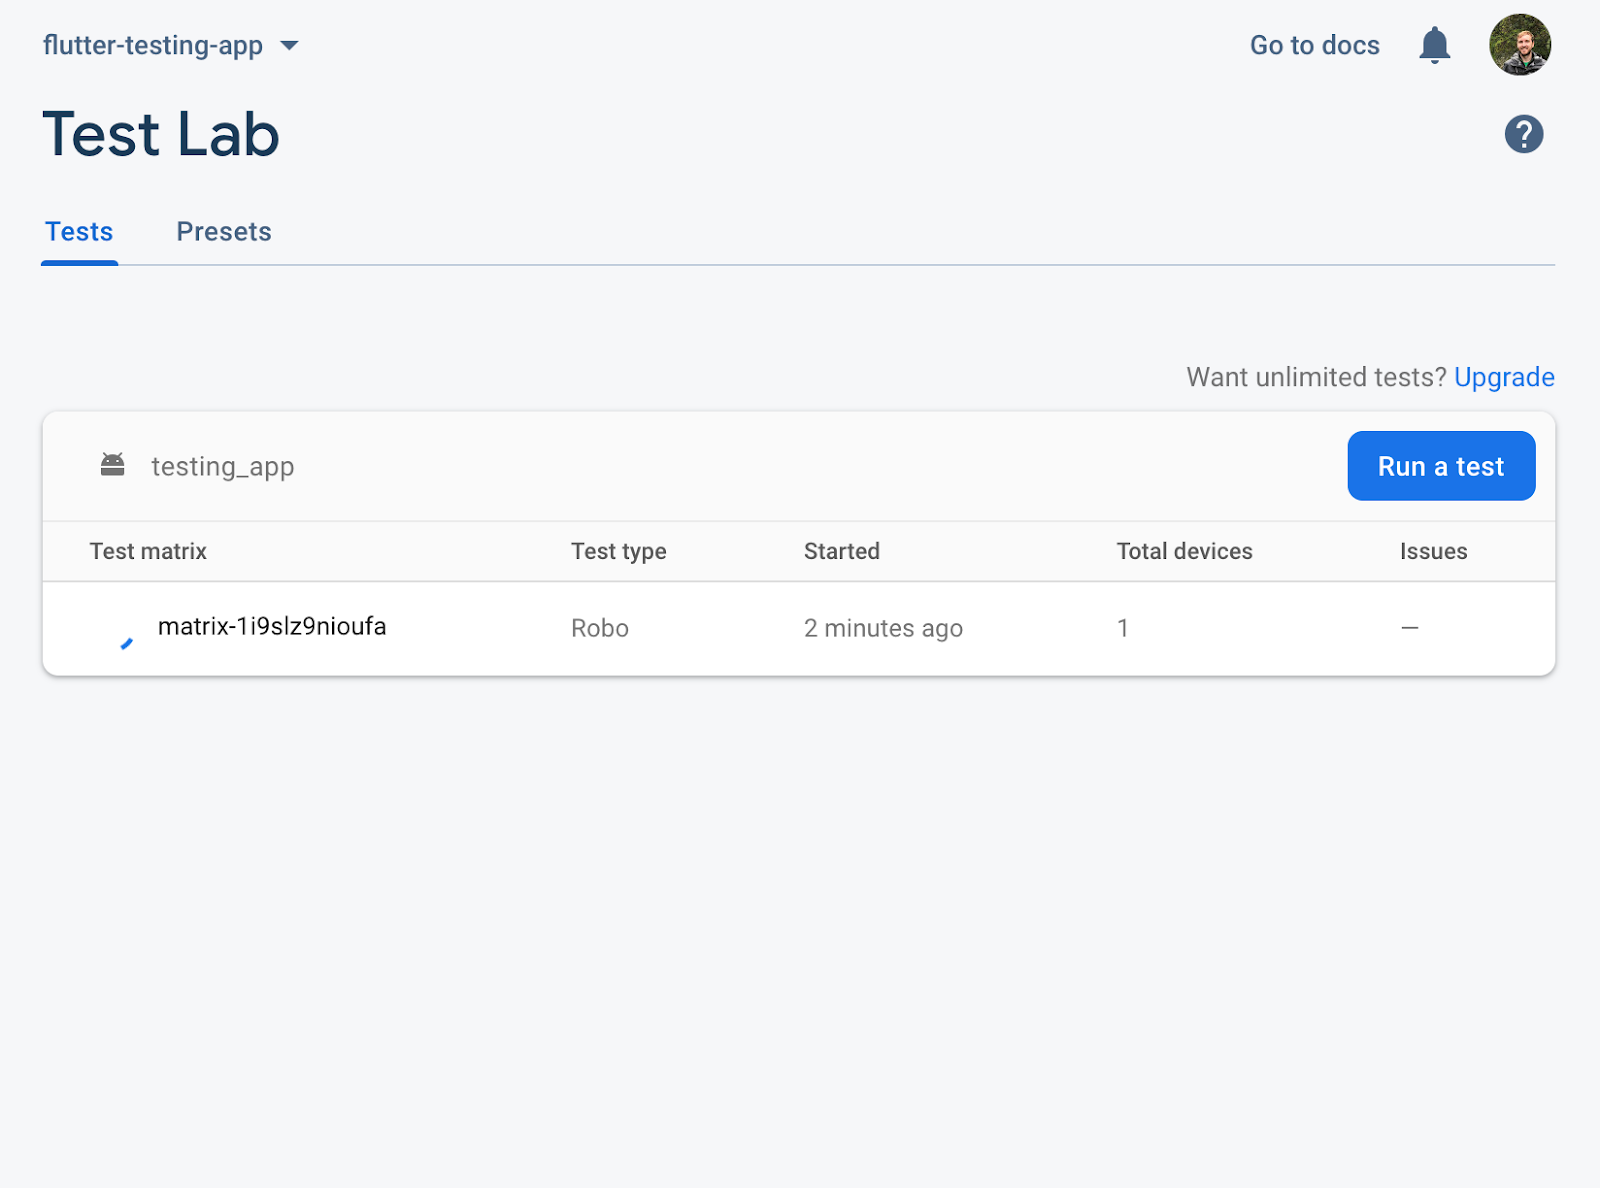
Click Run a test.
Select the Instrumentation test type.
-
Add the App APK to the App APK or AAB box.
<flutter_project_directory>/build/app/outputs/apk/debug/<file>.apk -
Add the Test APK to the Test APK box.
<flutter_project_directory>/build/app/outputs/apk/androidTest/debug/<file>.apk
-
If a failure occurs, click the red icon to view the output:

Test in Firebase Test Lab (iOS)
#You can use Firebase Test Lab to test iOS targets.
iOS setup
#Follow the iOS Device Testing instructions.
Test Lab project setup
#Launch your Firebase Console.
Create a new Firebase project if necessary.
-
Navigate to Quality > Test Lab.
Upload Xcode tests through the Firebase Console
#To learn how to upload tests from a ZIP file, using the Firebase Test Lab Console, consult the Firebase Test Lab iOS instructions.
Upload Xcode tests to Firebase Console with the command line
#To learn how to upload tests from a ZIP file from the command line to the Firebase Test Lab Console, consult the iOS Device Testing instructions.
Unless stated otherwise, the documentation on this site reflects Flutter 3.44.0. Page last updated on 2026-05-05. View source or report an issue.