# Set up Flutter flavors for Android
> How to create build flavors specific to different release types or development environments.
This guide shows you how to create Flutter flavors for an
Android app.
## Overview
A Flutter flavor when used with Android represents a unified
term for various platform-specific features. For example, a
flavor could determine which icon, app name, API key,
feature flag, and logging level is associated with a
specific version of your app.
If you want to create Flutter flavors for an Android app,
you can do this in Flutter. In Android, a Flutter flavor is
referred to as a [_product flavor_][].
The following illustrates an example of the Android
[_build variants_] that are created when an Android app has
two product flavors (`staging`, `production`) and two build
types (`debug`, `release`):
Product flavors
Build types
Resulting build variants
staging
debug
stagingDebug
stagingRelease
production
release
productionDebug
productionRelease
[_product flavor_]: https://developer.android.com/build/build-variants#product-flavors
[_build variants_]: https://developer.android.com/build/build-variants
## Configure your product flavors {: #using-flavors-in-android }
Complete the following steps to add two Android product
flavors called `staging` and `production` to a new Flutter
project called `flavors_example`, and then test your project
to make sure that the flavors work as expected.
1. Create a new Flutter project called `flavors_example`
with Kotlin as the preferred Android language. By
default, the project includes the `debug` and
`release` Android build types.
```console title="console"
$ flutter create --android-language kotlin flavors_example
```
1. Add the product flavors called `staging` and
`production` to the `flavors_example` project.
* In the `flavors_example` project, navigate to the
`android/app/` directory and open `build.gradle.kts`.
* Add the `flavorsDimension` property and the
`productFlavors` properties inside of the
`android {} block`. Make sure that the `android {}`
block also contains the default
`debug` and `release` build types:
```kotlin title="build.gradle.kts"
android {
...
buildTypes {
getByName("debug") {...}
getByName("release") {...}
}
...
flavorDimensions += "default"
productFlavors {
create("staging") {
dimension = "default"
applicationIdSuffix = ".staging"
}
create("production") {
dimension = "default"
applicationIdSuffix = ".production"
}
}
}
```
1. To make sure that you've set up everything correctly,
run your app on the Android product flavors. You won't
see any differences because the configuration settings
haven't changed, but you do want to make sure that the
app can run.
* Start an Android emulator or connect a physical device
with developer options enabled.
* In the console, navigate to the `flavors_example`
directory and enter the following command to test the
`staging` flavor:
```console title="console"
$ flutter run --flavor staging
```
* Repeat the previous step for the `production` flavor.
1. If everything runs, you're ready to customize your
configurations. For more information, see
[Customize configurations][].
[Customize configurations]: #customize-configurations
## Launch a flavor {: #launching-your-app-flavors }
After you've created the product flavors for an Android app,
you can launch a specific product flavor through Flutter.
You can launch a product flavor with the Flutter CLI using
the following steps:
1. Start an Android emulator or connect a physical device
with developer options enabled.
1. In the console, navigate to the `flavors_example`
directory and enter the following command:
```console title="console"
$ flutter (run | build ) --flavor
```
* `(run | build )`: Replace this with one of the following:
* `run`: Runs the app in debug mode.
* `build`: Builds either an APK or an appbundle.
* ``: Either `apk` or `appbundle`.
* ``: Replace this with the name of your Android
product flavor (for example: `staging`, `production`).
Example:
```console title="console"
$ flutter build apk --flavor staging
```
## Use flavors in Flutter code
After you've configured your product flavors, you can change your app's behavior—such as pointing to different API endpoints or changing the theme—based on the active flavor.
The Flutter framework provides the `appFlavor` constant, which retrieves the name of the current flavor as a `String`. This value matches the flavor name passed to the `--flavor` flag during the `flutter run` or `flutter build` process.
### Access the current flavor
1. **Import the services library:**
To access the `appFlavor` constant, add the following import to your Dart file:
```dart
import 'package:flutter/services.dart';
```
1. **Check the flavor value:**
Use the `appFlavor` constant in your application logic (often in `main()`) to handle flavor-specific configurations:
```dart
void main() {
// appFlavor will match the flavor name from build.gradle.kts
if (appFlavor == 'production') {
// Logic for production environment
Config.apiUrl = 'https://api.flavors_example.com';
} else if (appFlavor == 'staging') {
// Logic for staging environment
Config.apiUrl = 'https://staging.api.flavors_example.com';
}
runApp(const MyApp());
}
```
:::note
The value of `appFlavor` matches the name of the product flavor you defined in your `build.gradle.kts` file (for example, `staging` or `production`). If no flavor is specified during the build, `appFlavor` returns `null`.
:::
## Customize configurations
After you've added product flavors, you can customize them
for your Android app.
### Create a distinct app display name
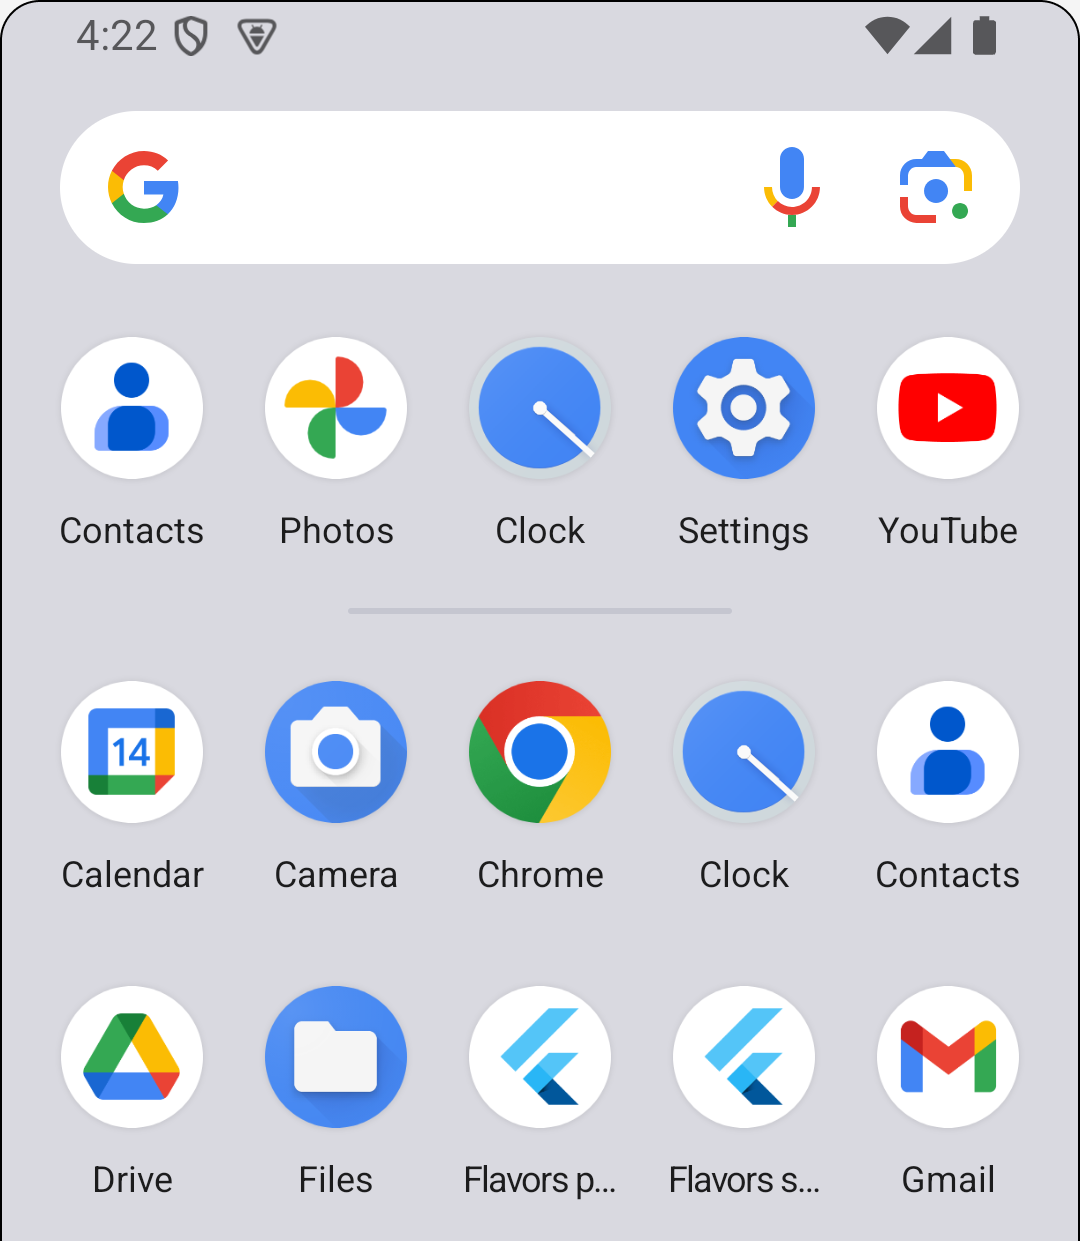
If you have multiple product flavors, a distinct app name
can quickly identify which flavor your deployed app is
using.
{:width="40%"}
The following steps show how to add distinct app display
names for two product flavors called `staging` and
`production` in a project called `flavors_example`.
1. Update `build.gradle.kts` in your IDE:
* In the `flavors_example` project, navigate to the
`android/app/` directory and open `build.gradle.kts`.
* In the `flavorsDimension` block, add a `resValue()`
property called `app_name` to the `staging` and
`production` flavors:
```kotlin title="build.gradle.kts"
android {
...
flavorDimensions += "default"
productFlavors {
create("staging") {
dimension = "default"
resValue(
type = "string",
name = "app_name",
value = "Flavors staging")
applicationIdSuffix = ".staging"
}
create("production") {
dimension = "default"
resValue(
type = "string",
name = "app_name",
value = "Flavors production")
applicationIdSuffix = ".production"
}
}
```
1. Update `AndroidManifest.xml` in your IDE:
* In the `flavors_example` project, navigate to
`android/app/src/main` and open `AndroidManifest.xml`.
* Replace the value for `android:label` with
`@string/app_name`.
```xml title="AndroidManifest.xml"
/>
```
1. Launch the app for each product flavor (`staging`,
`production`) and check to make sure that the
app display name has changed for each.
* To launch a product flavor, see the steps in
[Launch a flavor][].
* In the Android App Emulator, go to the list of apps.
You should see one for `Flavors p...` and
`Flavors s...`.
* To see more information for `Flavors p...` or
`Flavors s...`, long-press the icon for one of them
and select `App info`.
[Launch a flavor]: #launching-your-app-flavors
### Create distinct icons
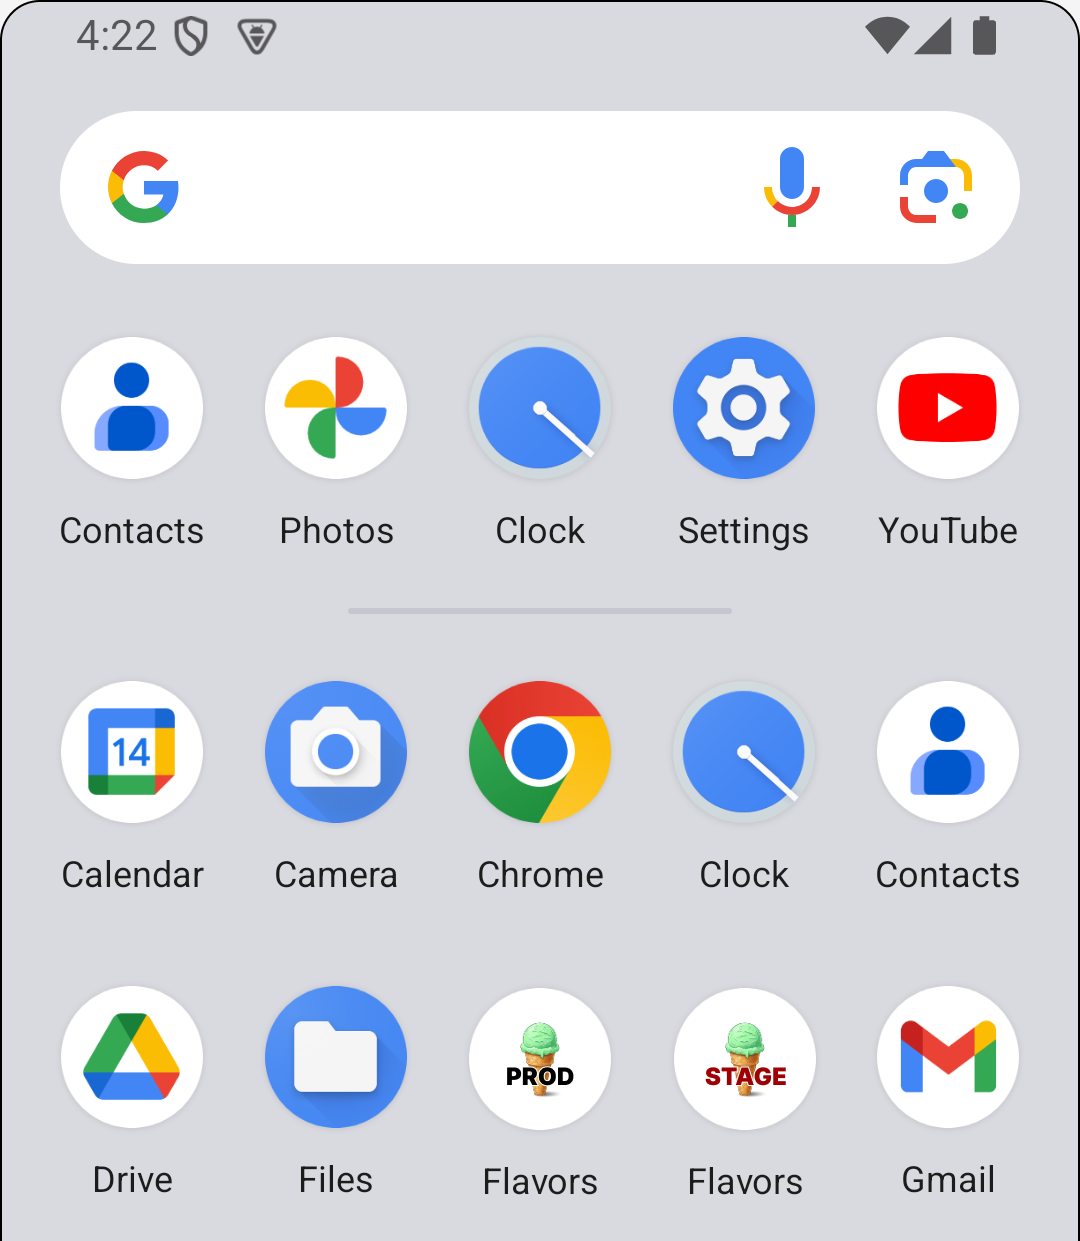
If you have multiple product flavors, a distinct icon for
each configuration can help you quickly identify which
flavor your deployed app is using.
{:width="40%"}
The following steps show how to add a distinct icon for two
product flavors called `staging` and `production` in a
project called `flavors_example`.
1. Prepare your icons:
* Design your `staging` icon and `production` icon in
the design tool of your choice.
* Generate versions of the `staging` icon and
`production` icon in the following sizes and them in
`PNG` format:
* mipmap-mdpi (48x48 pixels)
* mipmap-hdpi (72x72 pixels)
* mipmap-xhdpi (96x96 pixels)
* mipmap-xxhdpi (144x144 pixels)
* mipmap-xxxhdpi (192x192 pixels)
:::note
You can use a tool like [App Icon Generator][]
to generate the versions of your icons.
:::
1. Create flavor-specific resource directories:
* Navigate to the `android/app/src` directory.
* Create a directory called `staging/res`.
* Navigate to the `staging/res` directory.
* Create the following `mipmap` directories and move the
versions of the `staging` icon into them:
* `mipmap-mdpi/48x48_staging.png`
* `mipmap-hdpi/72x72_staging.png`
* `mipmap-xhdpi/96x96_staging.png`
* `mipmap-xxhdpi/144x144_staging.png`
* `mipmap-xxxhdpi/192x192_staging.png`
* Repeat the previous steps for the `production` flavor
directories and icons.
* Rename all of the icons to `ic_launcher.png`.
1. Double-check the configurations in `AndroidManifest.xml`
in your IDE:
* In the `flavors_example` project, navigate to
`android/app/src/main` and open `AndroidManifest.xml`.
* Make sure that the value for `android:icon` is
`@mipmap/ic_launcher`.
1. Launch the app for each product flavor (`staging`,
`production`) and check to make sure that the app icon
has changed for each. To launch a product flavor, see
the steps in [Launch a flavor][].
[Launch a flavor]: #launching-your-app-flavors
[App Icon Generator]: https://www.appicon.co/
### Bundle assets
If you have assets that are only used in a specific flavor
in your app, you can configure them to only be bundled into
your app when launching that flavor. This prevents your
app bundle size from being bloated by unused assets. To
bundle assets for each flavor, add the `flavors` subfield
to the `assets` field in your project's pubspec. To learn
more, see the [`assets` field][] in
[Flutter pubspec options][].
[`assets` field]: /tools/pubspec#assets
[Flutter pubspec options]: /tools/pubspec
### Set a default flavor
You can have your app use a specific flavor when you
launch your app without specifying a flavor. To do this,
you need to add the `default-flavor` field to your project's
pubspec. To learn more, see the [`default-flavor` field][]
in [Flutter pubspec options][].
[`default-flavor` field]: /tools/pubspec#default-flavor-field
### Add unique build settings
If you have additional build settings that you would like to
configure for a specific Android product flavor, see
Android's [Configure build variants][].
While it is possible to set `abiFilters` in product flavors, it is not
recommended. Prefer configuring `abiFilters` in `defaultConfig` when possible.
When setting `abiFilters` in product flavors, pass
`-Pdisable-abi-filtering=true` when running `flutter build` or `flutter run`.
[Configure build variants]: https://developer.android.com/build/build-variants
## More information
For more information on creating and using flavors, check out
the following resources:
* [Build flavors in Flutter (Android and iOS) with Firebase][]
* [How to Setup Flutter & Firebase with Multiple Flavors using the FlutterFire CLI][flutterfireCLI]
[Build flavors in Flutter (Android and iOS) with Firebase]: https://medium.com/@animeshjain/build-flavors-in-flutter-android-and-ios-with-different-firebase-projects-per-flavor-27c5c5dac10b
[flutterfireCLI]: https://codewithandrea.com/articles/flutter-firebase-multiple-flavors-flutterfire-cli/