# Add a Flutter Fragment to an Android app
> Learn how to add a Flutter Fragment to your existing Android app.
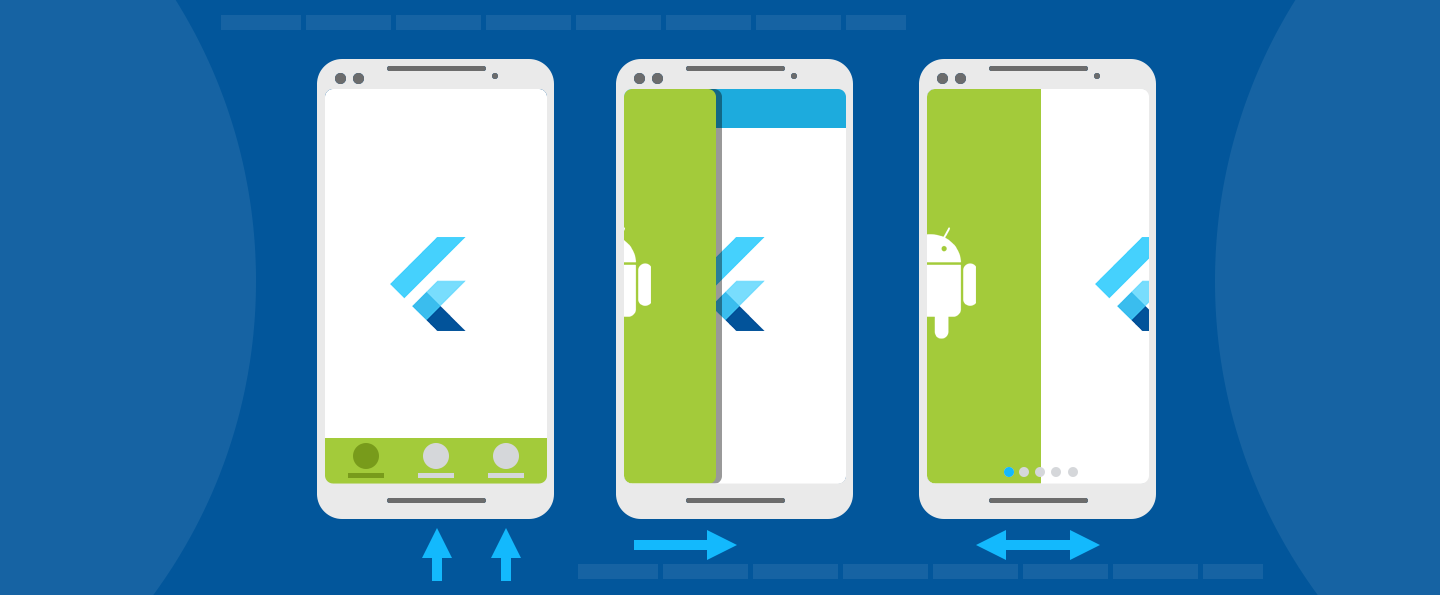 This guide describes how to add a Flutter `Fragment` to an existing
Android app. In Android, a [`Fragment`][] represents a modular
piece of a larger UI. A `Fragment` might be used to present
a sliding drawer, tabbed content, a page in a `ViewPager`,
or it might simply represent a normal screen in a
single-`Activity` app. Flutter provides a [`FlutterFragment`][]
so that developers can present a Flutter experience any place
that they can use a regular `Fragment`.
If an `Activity` is equally applicable for your application needs,
consider [using a `FlutterActivity`][] instead of a
`FlutterFragment`, which is quicker and easier to use.
`FlutterFragment` allows developers to control the following
details of the Flutter experience within the `Fragment`:
* Initial Flutter route
* Dart entrypoint to execute
* Opaque vs translucent background
* Whether `FlutterFragment` should control its surrounding `Activity`
* Whether a new [`FlutterEngine`][] or a cached `FlutterEngine` should be used
`FlutterFragment` also comes with a number of calls that
must be forwarded from its surrounding `Activity`.
These calls allow Flutter to react appropriately to OS events.
All varieties of `FlutterFragment`, and its requirements,
are described in this guide.
## Add a `FlutterFragment` to an `Activity` with a new `FlutterEngine`
The first thing to do to use a `FlutterFragment` is to add it to a host
`Activity`.
To add a `FlutterFragment` to a host `Activity`, instantiate and
attach an instance of `FlutterFragment` in `onCreate()` within the
`Activity`, or at another time that works for your app:
```kotlin title="MyActivity.kt"
class MyActivity : FragmentActivity() {
companion object {
// Define a tag String to represent the FlutterFragment within this
// Activity's FragmentManager. This value can be whatever you'd like.
private const val TAG_FLUTTER_FRAGMENT = "flutter_fragment"
}
// Declare a local variable to reference the FlutterFragment so that you
// can forward calls to it later.
private var flutterFragment: FlutterFragment? = null
override fun onCreate(savedInstanceState: Bundle?) {
super.onCreate(savedInstanceState)
// Inflate a layout that has a container for your FlutterFragment. For
// this example, assume that a FrameLayout exists with an ID of
// R.id.fragment_container.
setContentView(R.layout.my_activity_layout)
// Get a reference to the Activity's FragmentManager to add a new
// FlutterFragment, or find an existing one.
val fragmentManager: FragmentManager = supportFragmentManager
// Attempt to find an existing FlutterFragment, in case this is not the
// first time that onCreate() was run.
flutterFragment = fragmentManager
.findFragmentByTag(TAG_FLUTTER_FRAGMENT) as FlutterFragment?
// Create and attach a FlutterFragment if one does not exist.
if (flutterFragment == null) {
var newFlutterFragment = FlutterFragment.createDefault()
flutterFragment = newFlutterFragment
fragmentManager
.beginTransaction()
.add(
R.id.fragment_container,
newFlutterFragment,
TAG_FLUTTER_FRAGMENT
)
.commit()
}
}
}
```
```java title="MyActivity.java"
public class MyActivity extends FragmentActivity {
// Define a tag String to represent the FlutterFragment within this
// Activity's FragmentManager. This value can be whatever you'd like.
private static final String TAG_FLUTTER_FRAGMENT = "flutter_fragment";
// Declare a local variable to reference the FlutterFragment so that you
// can forward calls to it later.
private FlutterFragment flutterFragment;
@Override
protected void onCreate(Bundle savedInstanceState) {
super.onCreate(savedInstanceState);
// Inflate a layout that has a container for your FlutterFragment.
// For this example, assume that a FrameLayout exists with an ID of
// R.id.fragment_container.
setContentView(R.layout.my_activity_layout);
// Get a reference to the Activity's FragmentManager to add a new
// FlutterFragment, or find an existing one.
FragmentManager fragmentManager = getSupportFragmentManager();
// Attempt to find an existing FlutterFragment,
// in case this is not the first time that onCreate() was run.
flutterFragment = (FlutterFragment) fragmentManager
.findFragmentByTag(TAG_FLUTTER_FRAGMENT);
// Create and attach a FlutterFragment if one does not exist.
if (flutterFragment == null) {
flutterFragment = FlutterFragment.createDefault();
fragmentManager
.beginTransaction()
.add(
R.id.fragment_container,
flutterFragment,
TAG_FLUTTER_FRAGMENT
)
.commit();
}
}
}
```
The previous code is sufficient to render a Flutter UI
that begins with a call to your `main()` Dart entrypoint,
an initial Flutter route of `/`, and a new `FlutterEngine`.
However, this code is not sufficient to achieve all expected
Flutter behavior. Flutter depends on various OS signals that
must be forwarded from your host `Activity` to `FlutterFragment`.
These calls are shown in the following example:
```kotlin title="MyActivity.kt"
class MyActivity : FragmentActivity() {
override fun onPostResume() {
super.onPostResume()
flutterFragment!!.onPostResume()
}
override fun onNewIntent(@NonNull intent: Intent) {
flutterFragment!!.onNewIntent(intent)
}
override fun onBackPressed() {
flutterFragment!!.onBackPressed()
}
override fun onRequestPermissionsResult(
requestCode: Int,
permissions: Array,
grantResults: IntArray
) {
flutterFragment!!.onRequestPermissionsResult(
requestCode,
permissions,
grantResults
)
}
override fun onActivityResult(
requestCode: Int,
resultCode: Int,
data: Intent?
) {
super.onActivityResult(requestCode, resultCode, data)
flutterFragment!!.onActivityResult(
requestCode,
resultCode,
data
)
}
override fun onUserLeaveHint() {
flutterFragment!!.onUserLeaveHint()
}
override fun onTrimMemory(level: Int) {
super.onTrimMemory(level)
flutterFragment!!.onTrimMemory(level)
}
}
```
```java title="MyActivity.java"
public class MyActivity extends FragmentActivity {
@Override
public void onPostResume() {
super.onPostResume();
flutterFragment.onPostResume();
}
@Override
protected void onNewIntent(@NonNull Intent intent) {
flutterFragment.onNewIntent(intent);
}
@Override
public void onBackPressed() {
flutterFragment.onBackPressed();
}
@Override
public void onRequestPermissionsResult(
int requestCode,
@NonNull String[] permissions,
@NonNull int[] grantResults
) {
flutterFragment.onRequestPermissionsResult(
requestCode,
permissions,
grantResults
);
}
@Override
public void onActivityResult(
int requestCode,
int resultCode,
@Nullable Intent data
) {
super.onActivityResult(requestCode, resultCode, data);
flutterFragment.onActivityResult(
requestCode,
resultCode,
data
);
}
@Override
public void onUserLeaveHint() {
flutterFragment.onUserLeaveHint();
}
@Override
public void onTrimMemory(int level) {
super.onTrimMemory(level);
flutterFragment.onTrimMemory(level);
}
}
```
With the OS signals forwarded to Flutter,
your `FlutterFragment` works as expected.
You have now added a `FlutterFragment` to your existing Android app.
The simplest integration path uses a new `FlutterEngine`,
which comes with a non-trivial initialization time,
leading to a blank UI until Flutter is
initialized and rendered the first time.
Most of this time overhead can be avoided by using
a cached, pre-warmed `FlutterEngine`, which is discussed next.
## Using a pre-warmed `FlutterEngine`
By default, a `FlutterFragment` creates its own instance
of a `FlutterEngine`, which requires non-trivial warm-up time.
This means your user sees a blank `Fragment` for a brief moment.
You can mitigate most of this warm-up time by
using an existing, pre-warmed instance of `FlutterEngine`.
To use a pre-warmed `FlutterEngine` in a `FlutterFragment`,
instantiate a `FlutterFragment` with the `withCachedEngine()`
factory method.
```kotlin title="MyApplication.kt"
// Somewhere in your app, before your FlutterFragment is needed,
// like in the Application class ...
// Instantiate a FlutterEngine.
val flutterEngine = FlutterEngine(context)
// Start executing Dart code in the FlutterEngine.
flutterEngine.getDartExecutor().executeDartEntrypoint(
DartEntrypoint.createDefault()
)
// Cache the pre-warmed FlutterEngine to be used later by FlutterFragment.
FlutterEngineCache
.getInstance()
.put("my_engine_id", flutterEngine)
```
```kotlin title="MyActivity.java"
FlutterFragment.withCachedEngine("my_engine_id").build()
```
```java title="MyApplication.java"
// Somewhere in your app, before your FlutterFragment is needed,
// like in the Application class ...
// Instantiate a FlutterEngine.
FlutterEngine flutterEngine = new FlutterEngine(context);
// Start executing Dart code in the FlutterEngine.
flutterEngine.getDartExecutor().executeDartEntrypoint(
DartEntrypoint.createDefault()
);
// Cache the pre-warmed FlutterEngine to be used later by FlutterFragment.
FlutterEngineCache
.getInstance()
.put("my_engine_id", flutterEngine);
```
```java title="MyActivity.java"
FlutterFragment.withCachedEngine("my_engine_id").build();
```
`FlutterFragment` internally knows about [`FlutterEngineCache`][]
and retrieves the pre-warmed `FlutterEngine` based on the ID
given to `withCachedEngine()`.
By providing a pre-warmed `FlutterEngine`,
as previously shown, your app renders the
first Flutter frame as quickly as possible.
#### Initial route with a cached engine
The concept of an initial route is available when configuring a
`FlutterActivity` or a `FlutterFragment` with a new `FlutterEngine`.
However, `FlutterActivity` and `FlutterFragment` don't offer the
concept of an initial route when using a cached engine.
This is because a cached engine is expected to already be
running Dart code, which means it's too late to configure the
initial route.
Developers that would like their cached engine to begin
with a custom initial route can configure their cached
`FlutterEngine` to use a custom initial route just before
executing the Dart entrypoint. The following example
demonstrates the use of an initial route with a cached engine:
```kotlin title="MyApplication.kt"
class MyApplication : Application() {
lateinit var flutterEngine : FlutterEngine
override fun onCreate() {
super.onCreate()
// Instantiate a FlutterEngine.
flutterEngine = FlutterEngine(this)
// Configure an initial route.
flutterEngine.navigationChannel.setInitialRoute("your/route/here");
// Start executing Dart code to pre-warm the FlutterEngine.
flutterEngine.dartExecutor.executeDartEntrypoint(
DartExecutor.DartEntrypoint.createDefault()
)
// Cache the FlutterEngine to be used by FlutterActivity or FlutterFragment.
FlutterEngineCache
.getInstance()
.put("my_engine_id", flutterEngine)
}
}
```
```java title="MyApplication.java"
public class MyApplication extends Application {
@Override
public void onCreate() {
super.onCreate();
// Instantiate a FlutterEngine.
flutterEngine = new FlutterEngine(this);
// Configure an initial route.
flutterEngine.getNavigationChannel().setInitialRoute("your/route/here");
// Start executing Dart code to pre-warm the FlutterEngine.
flutterEngine.getDartExecutor().executeDartEntrypoint(
DartEntrypoint.createDefault()
);
// Cache the FlutterEngine to be used by FlutterActivity or FlutterFragment.
FlutterEngineCache
.getInstance()
.put("my_engine_id", flutterEngine);
}
}
```
By setting the initial route of the navigation channel, the associated
`FlutterEngine` displays the desired route upon initial execution of the
`runApp()` Dart function.
Changing the initial route property of the navigation channel
after the initial execution of `runApp()` has no effect.
Developers who would like to use the same `FlutterEngine`
between different `Activity`s and `Fragment`s and switch
the route between those displays need to set up a method channel and
explicitly instruct their Dart code to change `Navigator` routes.
## Display a splash screen
The initial display of Flutter content requires some wait time,
even if a pre-warmed `FlutterEngine` is used.
To help improve the user experience around
this brief waiting period, Flutter supports the
display of a splash screen (also known as "launch screen") until Flutter
renders its first frame. For instructions about how to show a launch
screen, see the [splash screen guide][].
## Run Flutter with a specified initial route
An Android app might contain many independent Flutter experiences,
running in different `FlutterFragment`s, with different
`FlutterEngine`s. In these scenarios,
it's common for each Flutter experience to begin with different
initial routes (routes other than `/`).
To facilitate this, `FlutterFragment`'s `Builder`
allows you to specify a desired initial route, as shown:
```kotlin title="MyActivity.kt"
// With a new FlutterEngine.
val flutterFragment = FlutterFragment.withNewEngine()
.initialRoute("myInitialRoute/")
.build()
```
```java title="MyActivity.java"
// With a new FlutterEngine.
FlutterFragment flutterFragment = FlutterFragment.withNewEngine()
.initialRoute("myInitialRoute/")
.build();
```
:::note
`FlutterFragment`'s initial route property has no effect when a pre-warmed
`FlutterEngine` is used because the pre-warmed `FlutterEngine` already
chose an initial route. The initial route can be chosen explicitly when
pre-warming a `FlutterEngine`.
:::
## Run Flutter from a specified entrypoint
Similar to varying initial routes, different
`FlutterFragment`s might want to execute different
Dart entrypoints. In a typical Flutter app, there is only one
Dart entrypoint: `main()`, but you can define other entrypoints.
`FlutterFragment` supports specification of the desired
Dart entrypoint to execute for the given Flutter experience.
To specify an entrypoint, build `FlutterFragment`, as shown:
```kotlin title="MyActivity.kt"
val flutterFragment = FlutterFragment.withNewEngine()
.dartEntrypoint("mySpecialEntrypoint")
.build()
```
```java title="MyActivity.java"
FlutterFragment flutterFragment = FlutterFragment.withNewEngine()
.dartEntrypoint("mySpecialEntrypoint")
.build();
```
The `FlutterFragment` configuration results in the execution
of a Dart entrypoint called `mySpecialEntrypoint()`.
Notice that the parentheses `()` are
not included in the `dartEntrypoint` `String` name.
:::note
`FlutterFragment`'s Dart entrypoint property has no effect
when a pre-warmed `FlutterEngine` is used because the
pre-warmed `FlutterEngine` already executed a Dart entrypoint.
The Dart entrypoint can be chosen explicitly when pre-warming
a `FlutterEngine`.
:::
## Control `FlutterFragment`'s render mode
`FlutterFragment` can either use a `SurfaceView` to render its
Flutter content, or it can use a `TextureView`.
The default is `SurfaceView`, which is significantly
better for performance than `TextureView`. However, `SurfaceView`
can't be interleaved in the middle of an Android `View` hierarchy.
A `SurfaceView` must either be the bottommost `View` in the hierarchy,
or the topmost `View` in the hierarchy.
Additionally, on Android versions before Android N,
`SurfaceView`s can't be animated because their layout and rendering
aren't synchronized with the rest of the `View` hierarchy.
If either of these use cases are requirements for your app,
then you need to use `TextureView` instead of `SurfaceView`.
Select a `TextureView` by building a `FlutterFragment` with a
`texture` `RenderMode`:
```kotlin title="MyActivity.kt"
// With a new FlutterEngine.
val flutterFragment = FlutterFragment.withNewEngine()
.renderMode(FlutterView.RenderMode.texture)
.build()
// With a cached FlutterEngine.
val flutterFragment = FlutterFragment.withCachedEngine("my_engine_id")
.renderMode(FlutterView.RenderMode.texture)
.build()
```
```java title="MyActivity.java"
// With a new FlutterEngine.
FlutterFragment flutterFragment = FlutterFragment.withNewEngine()
.renderMode(FlutterView.RenderMode.texture)
.build();
// With a cached FlutterEngine.
FlutterFragment flutterFragment = FlutterFragment.withCachedEngine("my_engine_id")
.renderMode(FlutterView.RenderMode.texture)
.build();
```
Using the configuration shown, the resulting `FlutterFragment`
renders its UI to a `TextureView`.
## Display a `FlutterFragment` with transparency
By default, `FlutterFragment` renders with an opaque background,
using a `SurfaceView`. (See "Control `FlutterFragment`'s render
mode.") That background is black for any pixels that aren't
painted by Flutter. Rendering with an opaque background is
the preferred rendering mode for performance reasons.
Flutter rendering with transparency on Android negatively
affects performance. However, there are many designs that
require transparent pixels in the Flutter experience that
show through to the underlying Android UI. For this reason,
Flutter supports translucency in a `FlutterFragment`.
:::note
Both `SurfaceView` and `TextureView` support transparency.
However, when a `SurfaceView` is instructed to render with
transparency, it positions itself at a higher z-index than
all other Android `View`s, which means it appears
above all other `View`s. This is a limitation of `SurfaceView`.
If it's acceptable to render your Flutter experience on top
of all other content, then `FlutterFragment`'s default
`RenderMode` of `surface` is the `RenderMode` that you
should use. However, if you need to display Android `View`s both
above and below your Flutter experience, then you must specify a
`RenderMode` of `texture`.
See "Control `FlutterFragment`'s render mode"
for information about controlling the `RenderMode`.
:::
To enable transparency for a `FlutterFragment`,
build it with the following configuration:
```kotlin title="MyActivity.kt"
// Using a new FlutterEngine.
val flutterFragment = FlutterFragment.withNewEngine()
.transparencyMode(FlutterView.TransparencyMode.transparent)
.build()
// Using a cached FlutterEngine.
val flutterFragment = FlutterFragment.withCachedEngine("my_engine_id")
.transparencyMode(FlutterView.TransparencyMode.transparent)
.build()
```
```java title="MyActivity.java"
// Using a new FlutterEngine.
FlutterFragment flutterFragment = FlutterFragment.withNewEngine()
.transparencyMode(FlutterView.TransparencyMode.transparent)
.build();
// Using a cached FlutterEngine.
FlutterFragment flutterFragment = FlutterFragment.withCachedEngine("my_engine_id")
.transparencyMode(FlutterView.TransparencyMode.transparent)
.build();
```
## The relationship between `FlutterFragment` and its `Activity`
Some apps choose to use `Fragment`s as entire Android screens.
In these apps, it would be reasonable for a `Fragment` to
control system chrome like Android's status bar,
navigation bar, and orientation.
This guide describes how to add a Flutter `Fragment` to an existing
Android app. In Android, a [`Fragment`][] represents a modular
piece of a larger UI. A `Fragment` might be used to present
a sliding drawer, tabbed content, a page in a `ViewPager`,
or it might simply represent a normal screen in a
single-`Activity` app. Flutter provides a [`FlutterFragment`][]
so that developers can present a Flutter experience any place
that they can use a regular `Fragment`.
If an `Activity` is equally applicable for your application needs,
consider [using a `FlutterActivity`][] instead of a
`FlutterFragment`, which is quicker and easier to use.
`FlutterFragment` allows developers to control the following
details of the Flutter experience within the `Fragment`:
* Initial Flutter route
* Dart entrypoint to execute
* Opaque vs translucent background
* Whether `FlutterFragment` should control its surrounding `Activity`
* Whether a new [`FlutterEngine`][] or a cached `FlutterEngine` should be used
`FlutterFragment` also comes with a number of calls that
must be forwarded from its surrounding `Activity`.
These calls allow Flutter to react appropriately to OS events.
All varieties of `FlutterFragment`, and its requirements,
are described in this guide.
## Add a `FlutterFragment` to an `Activity` with a new `FlutterEngine`
The first thing to do to use a `FlutterFragment` is to add it to a host
`Activity`.
To add a `FlutterFragment` to a host `Activity`, instantiate and
attach an instance of `FlutterFragment` in `onCreate()` within the
`Activity`, or at another time that works for your app:
```kotlin title="MyActivity.kt"
class MyActivity : FragmentActivity() {
companion object {
// Define a tag String to represent the FlutterFragment within this
// Activity's FragmentManager. This value can be whatever you'd like.
private const val TAG_FLUTTER_FRAGMENT = "flutter_fragment"
}
// Declare a local variable to reference the FlutterFragment so that you
// can forward calls to it later.
private var flutterFragment: FlutterFragment? = null
override fun onCreate(savedInstanceState: Bundle?) {
super.onCreate(savedInstanceState)
// Inflate a layout that has a container for your FlutterFragment. For
// this example, assume that a FrameLayout exists with an ID of
// R.id.fragment_container.
setContentView(R.layout.my_activity_layout)
// Get a reference to the Activity's FragmentManager to add a new
// FlutterFragment, or find an existing one.
val fragmentManager: FragmentManager = supportFragmentManager
// Attempt to find an existing FlutterFragment, in case this is not the
// first time that onCreate() was run.
flutterFragment = fragmentManager
.findFragmentByTag(TAG_FLUTTER_FRAGMENT) as FlutterFragment?
// Create and attach a FlutterFragment if one does not exist.
if (flutterFragment == null) {
var newFlutterFragment = FlutterFragment.createDefault()
flutterFragment = newFlutterFragment
fragmentManager
.beginTransaction()
.add(
R.id.fragment_container,
newFlutterFragment,
TAG_FLUTTER_FRAGMENT
)
.commit()
}
}
}
```
```java title="MyActivity.java"
public class MyActivity extends FragmentActivity {
// Define a tag String to represent the FlutterFragment within this
// Activity's FragmentManager. This value can be whatever you'd like.
private static final String TAG_FLUTTER_FRAGMENT = "flutter_fragment";
// Declare a local variable to reference the FlutterFragment so that you
// can forward calls to it later.
private FlutterFragment flutterFragment;
@Override
protected void onCreate(Bundle savedInstanceState) {
super.onCreate(savedInstanceState);
// Inflate a layout that has a container for your FlutterFragment.
// For this example, assume that a FrameLayout exists with an ID of
// R.id.fragment_container.
setContentView(R.layout.my_activity_layout);
// Get a reference to the Activity's FragmentManager to add a new
// FlutterFragment, or find an existing one.
FragmentManager fragmentManager = getSupportFragmentManager();
// Attempt to find an existing FlutterFragment,
// in case this is not the first time that onCreate() was run.
flutterFragment = (FlutterFragment) fragmentManager
.findFragmentByTag(TAG_FLUTTER_FRAGMENT);
// Create and attach a FlutterFragment if one does not exist.
if (flutterFragment == null) {
flutterFragment = FlutterFragment.createDefault();
fragmentManager
.beginTransaction()
.add(
R.id.fragment_container,
flutterFragment,
TAG_FLUTTER_FRAGMENT
)
.commit();
}
}
}
```
The previous code is sufficient to render a Flutter UI
that begins with a call to your `main()` Dart entrypoint,
an initial Flutter route of `/`, and a new `FlutterEngine`.
However, this code is not sufficient to achieve all expected
Flutter behavior. Flutter depends on various OS signals that
must be forwarded from your host `Activity` to `FlutterFragment`.
These calls are shown in the following example:
```kotlin title="MyActivity.kt"
class MyActivity : FragmentActivity() {
override fun onPostResume() {
super.onPostResume()
flutterFragment!!.onPostResume()
}
override fun onNewIntent(@NonNull intent: Intent) {
flutterFragment!!.onNewIntent(intent)
}
override fun onBackPressed() {
flutterFragment!!.onBackPressed()
}
override fun onRequestPermissionsResult(
requestCode: Int,
permissions: Array,
grantResults: IntArray
) {
flutterFragment!!.onRequestPermissionsResult(
requestCode,
permissions,
grantResults
)
}
override fun onActivityResult(
requestCode: Int,
resultCode: Int,
data: Intent?
) {
super.onActivityResult(requestCode, resultCode, data)
flutterFragment!!.onActivityResult(
requestCode,
resultCode,
data
)
}
override fun onUserLeaveHint() {
flutterFragment!!.onUserLeaveHint()
}
override fun onTrimMemory(level: Int) {
super.onTrimMemory(level)
flutterFragment!!.onTrimMemory(level)
}
}
```
```java title="MyActivity.java"
public class MyActivity extends FragmentActivity {
@Override
public void onPostResume() {
super.onPostResume();
flutterFragment.onPostResume();
}
@Override
protected void onNewIntent(@NonNull Intent intent) {
flutterFragment.onNewIntent(intent);
}
@Override
public void onBackPressed() {
flutterFragment.onBackPressed();
}
@Override
public void onRequestPermissionsResult(
int requestCode,
@NonNull String[] permissions,
@NonNull int[] grantResults
) {
flutterFragment.onRequestPermissionsResult(
requestCode,
permissions,
grantResults
);
}
@Override
public void onActivityResult(
int requestCode,
int resultCode,
@Nullable Intent data
) {
super.onActivityResult(requestCode, resultCode, data);
flutterFragment.onActivityResult(
requestCode,
resultCode,
data
);
}
@Override
public void onUserLeaveHint() {
flutterFragment.onUserLeaveHint();
}
@Override
public void onTrimMemory(int level) {
super.onTrimMemory(level);
flutterFragment.onTrimMemory(level);
}
}
```
With the OS signals forwarded to Flutter,
your `FlutterFragment` works as expected.
You have now added a `FlutterFragment` to your existing Android app.
The simplest integration path uses a new `FlutterEngine`,
which comes with a non-trivial initialization time,
leading to a blank UI until Flutter is
initialized and rendered the first time.
Most of this time overhead can be avoided by using
a cached, pre-warmed `FlutterEngine`, which is discussed next.
## Using a pre-warmed `FlutterEngine`
By default, a `FlutterFragment` creates its own instance
of a `FlutterEngine`, which requires non-trivial warm-up time.
This means your user sees a blank `Fragment` for a brief moment.
You can mitigate most of this warm-up time by
using an existing, pre-warmed instance of `FlutterEngine`.
To use a pre-warmed `FlutterEngine` in a `FlutterFragment`,
instantiate a `FlutterFragment` with the `withCachedEngine()`
factory method.
```kotlin title="MyApplication.kt"
// Somewhere in your app, before your FlutterFragment is needed,
// like in the Application class ...
// Instantiate a FlutterEngine.
val flutterEngine = FlutterEngine(context)
// Start executing Dart code in the FlutterEngine.
flutterEngine.getDartExecutor().executeDartEntrypoint(
DartEntrypoint.createDefault()
)
// Cache the pre-warmed FlutterEngine to be used later by FlutterFragment.
FlutterEngineCache
.getInstance()
.put("my_engine_id", flutterEngine)
```
```kotlin title="MyActivity.java"
FlutterFragment.withCachedEngine("my_engine_id").build()
```
```java title="MyApplication.java"
// Somewhere in your app, before your FlutterFragment is needed,
// like in the Application class ...
// Instantiate a FlutterEngine.
FlutterEngine flutterEngine = new FlutterEngine(context);
// Start executing Dart code in the FlutterEngine.
flutterEngine.getDartExecutor().executeDartEntrypoint(
DartEntrypoint.createDefault()
);
// Cache the pre-warmed FlutterEngine to be used later by FlutterFragment.
FlutterEngineCache
.getInstance()
.put("my_engine_id", flutterEngine);
```
```java title="MyActivity.java"
FlutterFragment.withCachedEngine("my_engine_id").build();
```
`FlutterFragment` internally knows about [`FlutterEngineCache`][]
and retrieves the pre-warmed `FlutterEngine` based on the ID
given to `withCachedEngine()`.
By providing a pre-warmed `FlutterEngine`,
as previously shown, your app renders the
first Flutter frame as quickly as possible.
#### Initial route with a cached engine
The concept of an initial route is available when configuring a
`FlutterActivity` or a `FlutterFragment` with a new `FlutterEngine`.
However, `FlutterActivity` and `FlutterFragment` don't offer the
concept of an initial route when using a cached engine.
This is because a cached engine is expected to already be
running Dart code, which means it's too late to configure the
initial route.
Developers that would like their cached engine to begin
with a custom initial route can configure their cached
`FlutterEngine` to use a custom initial route just before
executing the Dart entrypoint. The following example
demonstrates the use of an initial route with a cached engine:
```kotlin title="MyApplication.kt"
class MyApplication : Application() {
lateinit var flutterEngine : FlutterEngine
override fun onCreate() {
super.onCreate()
// Instantiate a FlutterEngine.
flutterEngine = FlutterEngine(this)
// Configure an initial route.
flutterEngine.navigationChannel.setInitialRoute("your/route/here");
// Start executing Dart code to pre-warm the FlutterEngine.
flutterEngine.dartExecutor.executeDartEntrypoint(
DartExecutor.DartEntrypoint.createDefault()
)
// Cache the FlutterEngine to be used by FlutterActivity or FlutterFragment.
FlutterEngineCache
.getInstance()
.put("my_engine_id", flutterEngine)
}
}
```
```java title="MyApplication.java"
public class MyApplication extends Application {
@Override
public void onCreate() {
super.onCreate();
// Instantiate a FlutterEngine.
flutterEngine = new FlutterEngine(this);
// Configure an initial route.
flutterEngine.getNavigationChannel().setInitialRoute("your/route/here");
// Start executing Dart code to pre-warm the FlutterEngine.
flutterEngine.getDartExecutor().executeDartEntrypoint(
DartEntrypoint.createDefault()
);
// Cache the FlutterEngine to be used by FlutterActivity or FlutterFragment.
FlutterEngineCache
.getInstance()
.put("my_engine_id", flutterEngine);
}
}
```
By setting the initial route of the navigation channel, the associated
`FlutterEngine` displays the desired route upon initial execution of the
`runApp()` Dart function.
Changing the initial route property of the navigation channel
after the initial execution of `runApp()` has no effect.
Developers who would like to use the same `FlutterEngine`
between different `Activity`s and `Fragment`s and switch
the route between those displays need to set up a method channel and
explicitly instruct their Dart code to change `Navigator` routes.
## Display a splash screen
The initial display of Flutter content requires some wait time,
even if a pre-warmed `FlutterEngine` is used.
To help improve the user experience around
this brief waiting period, Flutter supports the
display of a splash screen (also known as "launch screen") until Flutter
renders its first frame. For instructions about how to show a launch
screen, see the [splash screen guide][].
## Run Flutter with a specified initial route
An Android app might contain many independent Flutter experiences,
running in different `FlutterFragment`s, with different
`FlutterEngine`s. In these scenarios,
it's common for each Flutter experience to begin with different
initial routes (routes other than `/`).
To facilitate this, `FlutterFragment`'s `Builder`
allows you to specify a desired initial route, as shown:
```kotlin title="MyActivity.kt"
// With a new FlutterEngine.
val flutterFragment = FlutterFragment.withNewEngine()
.initialRoute("myInitialRoute/")
.build()
```
```java title="MyActivity.java"
// With a new FlutterEngine.
FlutterFragment flutterFragment = FlutterFragment.withNewEngine()
.initialRoute("myInitialRoute/")
.build();
```
:::note
`FlutterFragment`'s initial route property has no effect when a pre-warmed
`FlutterEngine` is used because the pre-warmed `FlutterEngine` already
chose an initial route. The initial route can be chosen explicitly when
pre-warming a `FlutterEngine`.
:::
## Run Flutter from a specified entrypoint
Similar to varying initial routes, different
`FlutterFragment`s might want to execute different
Dart entrypoints. In a typical Flutter app, there is only one
Dart entrypoint: `main()`, but you can define other entrypoints.
`FlutterFragment` supports specification of the desired
Dart entrypoint to execute for the given Flutter experience.
To specify an entrypoint, build `FlutterFragment`, as shown:
```kotlin title="MyActivity.kt"
val flutterFragment = FlutterFragment.withNewEngine()
.dartEntrypoint("mySpecialEntrypoint")
.build()
```
```java title="MyActivity.java"
FlutterFragment flutterFragment = FlutterFragment.withNewEngine()
.dartEntrypoint("mySpecialEntrypoint")
.build();
```
The `FlutterFragment` configuration results in the execution
of a Dart entrypoint called `mySpecialEntrypoint()`.
Notice that the parentheses `()` are
not included in the `dartEntrypoint` `String` name.
:::note
`FlutterFragment`'s Dart entrypoint property has no effect
when a pre-warmed `FlutterEngine` is used because the
pre-warmed `FlutterEngine` already executed a Dart entrypoint.
The Dart entrypoint can be chosen explicitly when pre-warming
a `FlutterEngine`.
:::
## Control `FlutterFragment`'s render mode
`FlutterFragment` can either use a `SurfaceView` to render its
Flutter content, or it can use a `TextureView`.
The default is `SurfaceView`, which is significantly
better for performance than `TextureView`. However, `SurfaceView`
can't be interleaved in the middle of an Android `View` hierarchy.
A `SurfaceView` must either be the bottommost `View` in the hierarchy,
or the topmost `View` in the hierarchy.
Additionally, on Android versions before Android N,
`SurfaceView`s can't be animated because their layout and rendering
aren't synchronized with the rest of the `View` hierarchy.
If either of these use cases are requirements for your app,
then you need to use `TextureView` instead of `SurfaceView`.
Select a `TextureView` by building a `FlutterFragment` with a
`texture` `RenderMode`:
```kotlin title="MyActivity.kt"
// With a new FlutterEngine.
val flutterFragment = FlutterFragment.withNewEngine()
.renderMode(FlutterView.RenderMode.texture)
.build()
// With a cached FlutterEngine.
val flutterFragment = FlutterFragment.withCachedEngine("my_engine_id")
.renderMode(FlutterView.RenderMode.texture)
.build()
```
```java title="MyActivity.java"
// With a new FlutterEngine.
FlutterFragment flutterFragment = FlutterFragment.withNewEngine()
.renderMode(FlutterView.RenderMode.texture)
.build();
// With a cached FlutterEngine.
FlutterFragment flutterFragment = FlutterFragment.withCachedEngine("my_engine_id")
.renderMode(FlutterView.RenderMode.texture)
.build();
```
Using the configuration shown, the resulting `FlutterFragment`
renders its UI to a `TextureView`.
## Display a `FlutterFragment` with transparency
By default, `FlutterFragment` renders with an opaque background,
using a `SurfaceView`. (See "Control `FlutterFragment`'s render
mode.") That background is black for any pixels that aren't
painted by Flutter. Rendering with an opaque background is
the preferred rendering mode for performance reasons.
Flutter rendering with transparency on Android negatively
affects performance. However, there are many designs that
require transparent pixels in the Flutter experience that
show through to the underlying Android UI. For this reason,
Flutter supports translucency in a `FlutterFragment`.
:::note
Both `SurfaceView` and `TextureView` support transparency.
However, when a `SurfaceView` is instructed to render with
transparency, it positions itself at a higher z-index than
all other Android `View`s, which means it appears
above all other `View`s. This is a limitation of `SurfaceView`.
If it's acceptable to render your Flutter experience on top
of all other content, then `FlutterFragment`'s default
`RenderMode` of `surface` is the `RenderMode` that you
should use. However, if you need to display Android `View`s both
above and below your Flutter experience, then you must specify a
`RenderMode` of `texture`.
See "Control `FlutterFragment`'s render mode"
for information about controlling the `RenderMode`.
:::
To enable transparency for a `FlutterFragment`,
build it with the following configuration:
```kotlin title="MyActivity.kt"
// Using a new FlutterEngine.
val flutterFragment = FlutterFragment.withNewEngine()
.transparencyMode(FlutterView.TransparencyMode.transparent)
.build()
// Using a cached FlutterEngine.
val flutterFragment = FlutterFragment.withCachedEngine("my_engine_id")
.transparencyMode(FlutterView.TransparencyMode.transparent)
.build()
```
```java title="MyActivity.java"
// Using a new FlutterEngine.
FlutterFragment flutterFragment = FlutterFragment.withNewEngine()
.transparencyMode(FlutterView.TransparencyMode.transparent)
.build();
// Using a cached FlutterEngine.
FlutterFragment flutterFragment = FlutterFragment.withCachedEngine("my_engine_id")
.transparencyMode(FlutterView.TransparencyMode.transparent)
.build();
```
## The relationship between `FlutterFragment` and its `Activity`
Some apps choose to use `Fragment`s as entire Android screens.
In these apps, it would be reasonable for a `Fragment` to
control system chrome like Android's status bar,
navigation bar, and orientation.
 In other apps, `Fragment`s are used to represent only
a portion of a UI. A `FlutterFragment` might be used to
implement the inside of a drawer, a video player,
or a single card. In these situations, it would be
inappropriate for the `FlutterFragment` to affect
Android's system chrome because there are other UI
pieces within the same `Window`.
In other apps, `Fragment`s are used to represent only
a portion of a UI. A `FlutterFragment` might be used to
implement the inside of a drawer, a video player,
or a single card. In these situations, it would be
inappropriate for the `FlutterFragment` to affect
Android's system chrome because there are other UI
pieces within the same `Window`.
 `FlutterFragment` comes with a concept that helps
differentiate between the case when a `FlutterFragment`
should be able to control its host `Activity`, and the
cases when a `FlutterFragment` should only affect its
own behavior. To prevent a `FlutterFragment` from
exposing its `Activity` to Flutter plugins, and to
prevent Flutter from controlling the `Activity`'s system UI,
use the `shouldAttachEngineToActivity()` method in
`FlutterFragment`'s `Builder`, as shown:
```kotlin title="MyActivity.kt"
// Using a new FlutterEngine.
val flutterFragment = FlutterFragment.withNewEngine()
.shouldAttachEngineToActivity(false)
.build()
// Using a cached FlutterEngine.
val flutterFragment = FlutterFragment.withCachedEngine("my_engine_id")
.shouldAttachEngineToActivity(false)
.build()
```
```java title="MyActivity.java"
// Using a new FlutterEngine.
FlutterFragment flutterFragment = FlutterFragment.withNewEngine()
.shouldAttachEngineToActivity(false)
.build();
// Using a cached FlutterEngine.
FlutterFragment flutterFragment = FlutterFragment.withCachedEngine("my_engine_id")
.shouldAttachEngineToActivity(false)
.build();
```
Passing `false` to the `shouldAttachEngineToActivity()`
`Builder` method prevents Flutter from interacting with
the surrounding `Activity`. The default value is `true`,
which allows Flutter and Flutter plugins to interact with the
surrounding `Activity`.
:::note
Some plugins might expect or require an `Activity` reference.
Ensure that none of your plugins require an `Activity`
before you disable access.
:::
[`Fragment`]: https://developer.android.com/guide/components/fragments
[`FlutterFragment`]: https://api.flutter.dev/javadoc/io/flutter/embedding/android/FlutterFragment.html
[using a `FlutterActivity`]: /add-to-app/android/add-flutter-screen
[`FlutterEngine`]: https://api.flutter.dev/javadoc/io/flutter/embedding/engine/FlutterEngine.html
[`FlutterEngineCache`]: https://api.flutter.dev/javadoc/io/flutter/embedding/engine/FlutterEngineCache.html
[splash screen guide]: /platform-integration/android/splash-screen
`FlutterFragment` comes with a concept that helps
differentiate between the case when a `FlutterFragment`
should be able to control its host `Activity`, and the
cases when a `FlutterFragment` should only affect its
own behavior. To prevent a `FlutterFragment` from
exposing its `Activity` to Flutter plugins, and to
prevent Flutter from controlling the `Activity`'s system UI,
use the `shouldAttachEngineToActivity()` method in
`FlutterFragment`'s `Builder`, as shown:
```kotlin title="MyActivity.kt"
// Using a new FlutterEngine.
val flutterFragment = FlutterFragment.withNewEngine()
.shouldAttachEngineToActivity(false)
.build()
// Using a cached FlutterEngine.
val flutterFragment = FlutterFragment.withCachedEngine("my_engine_id")
.shouldAttachEngineToActivity(false)
.build()
```
```java title="MyActivity.java"
// Using a new FlutterEngine.
FlutterFragment flutterFragment = FlutterFragment.withNewEngine()
.shouldAttachEngineToActivity(false)
.build();
// Using a cached FlutterEngine.
FlutterFragment flutterFragment = FlutterFragment.withCachedEngine("my_engine_id")
.shouldAttachEngineToActivity(false)
.build();
```
Passing `false` to the `shouldAttachEngineToActivity()`
`Builder` method prevents Flutter from interacting with
the surrounding `Activity`. The default value is `true`,
which allows Flutter and Flutter plugins to interact with the
surrounding `Activity`.
:::note
Some plugins might expect or require an `Activity` reference.
Ensure that none of your plugins require an `Activity`
before you disable access.
:::
[`Fragment`]: https://developer.android.com/guide/components/fragments
[`FlutterFragment`]: https://api.flutter.dev/javadoc/io/flutter/embedding/android/FlutterFragment.html
[using a `FlutterActivity`]: /add-to-app/android/add-flutter-screen
[`FlutterEngine`]: https://api.flutter.dev/javadoc/io/flutter/embedding/engine/FlutterEngine.html
[`FlutterEngineCache`]: https://api.flutter.dev/javadoc/io/flutter/embedding/engine/FlutterEngineCache.html
[splash screen guide]: /platform-integration/android/splash-screen